


When working with in Microsoft Excel multiple people, do you ever find the need to hide certain columns to prevent others from viewing sensitive information? For instance, you might want to conceal salary details in a list of employees. But what if you don't just want to hide the information visually? What if you need to completely restrict access to it? Or share it just to some users?
In this article, we'll explore two approaches:
- How Excel can help with this requirement
- How our online collaborative table, RowShare, offers a more robust solution, giving you the full control over who can access which rows and columns (read or read&write)
Hide columns in Excel
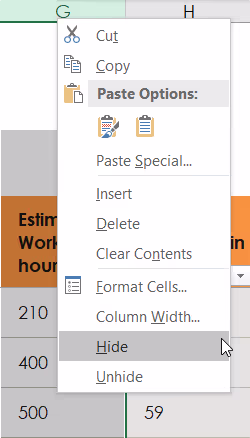
You can hide columns in Excel by following these simple steps:
- Right click on the header of any column you want to hide
- Select Hide
Note: After the selected column is hidden, anyone with whom you share the file can still unhide the column.
To prevent other users from unhiding the columns, you need to lock your Excel file once you have hidden the columns and protect your spreadsheet with a password. You can do this by following these steps:
- Click on Review
- Click on Protect Sheet
- Set a password

Note: If you lose your password, you won't be able to modify your sheet anymore.
In case you want certain users to see the hidden column, you can send them the password, but this also means that they can share your file with another person.
Sharing The File
Once the columns are hidden and the file locked, you have to get your Excel file to your contacts.
The option one is: to store your Excel file in the cloud such as Onedrive, Dropbox or Google Drive. Give the cloud access link to anyone you want to share your Excel file. As you store your Excel file in the cloud, each time you need to see or modify the hidden column(s), you must do the following steps:
- Unlock the sheet
- Unhide the column
- Make your changes
- Re-hide the column
- Re-lock the sheet again
Note: The file stored in the cloud is shared in real-time. It means that if there is another user accessing your file at the same time as you modify it, he/she would see your hidden information.
If you prefer to share your Excel the old-fashioned way, then another option is share it by email. Each time you need to see the make any modifications, you need to do the following steps:
- Unlock the sheet
- Unhide the column(s)
- Make your changes
- Re-hide the column(s)
- Re-lock the sheet again
- Send the new modified version to all users
Note: If you use Excel online, you can hide a column but you can’t lock it. This means that anyone accessing your Excel Online file can unhide your hidden column.
This is indeed not very complex but quite cumbersome because the columns are hidden for you as well. It's realistic for a one-time operation. But if you're frequently working with your team, it's not realistic.
This is one area where RowShare truly outshines Excel. While RowShare isn't meant to replace Excel, it excels at collaboration, especially when it comes to deciding what you want to share. It’s definitely worth exploring.
Alternative Solution, Simpler, Easier
RowShare, an online collaborative table, is here to help! While it’s not meant to replace Excel, it effectively complements Excel by offering a powerful way to collect and share information. Use Excel for data analysis, and RowShare to enhance your collaboration!
With RowShare, you can easily decide who can see which column with just a few clicks. Here’s how:
- Click on the 3 dots icon ⁝ in the header of the column you want to hide.
- Click on Column Permissions
- Set the column permission Read-only
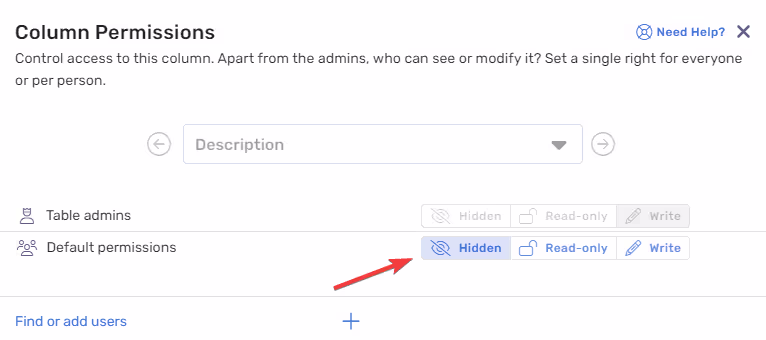
And that's it! Your column is now hidden to anyone who hasn't explicitely been invited to edit it, but you can modify it anytime. Of course you can give more permissions to specific users so that you're not the only one viewing it.
So, by accessing the same table through the same link, each person will see more or fewer columns based on what you've decided.
RowShare tables are stored in the cloud, meaning anyone can access the same version of a RowShare table anytime, anywhere. When you hide a column, that column becomes instantly inaccessible to all users viewing the table. Only you and selected users can see the hidden column.
This is just the start. RowShare makes it easier to decide who can read or modify each column but also each row. So everyone is working at the same time on the same data, but only accessing the data they need to work.
Give it a try! RowShare is free for 2 weeks, allowing you plenty of time to see if it meets your needs.


.avif)